Why I Gave Yoga a Second Chance
Fibromyalgia Yoga:
A few months later, a friend who also lives with fibro told me she did ten minutes of floor stretching every morning. Ten minutes. Not an hour-long class, not a fancy studio.
That got my attention. Some small studies have found that yoga may ease pain, tiredness and low mood in people with fibromyalgia. The results are modest, and it’s definitely not a cure. But “might help a little, with no gear required” was good enough for me to try again, this time on my own terms.
What Fibromyalgia Yoga Actually Looks Like
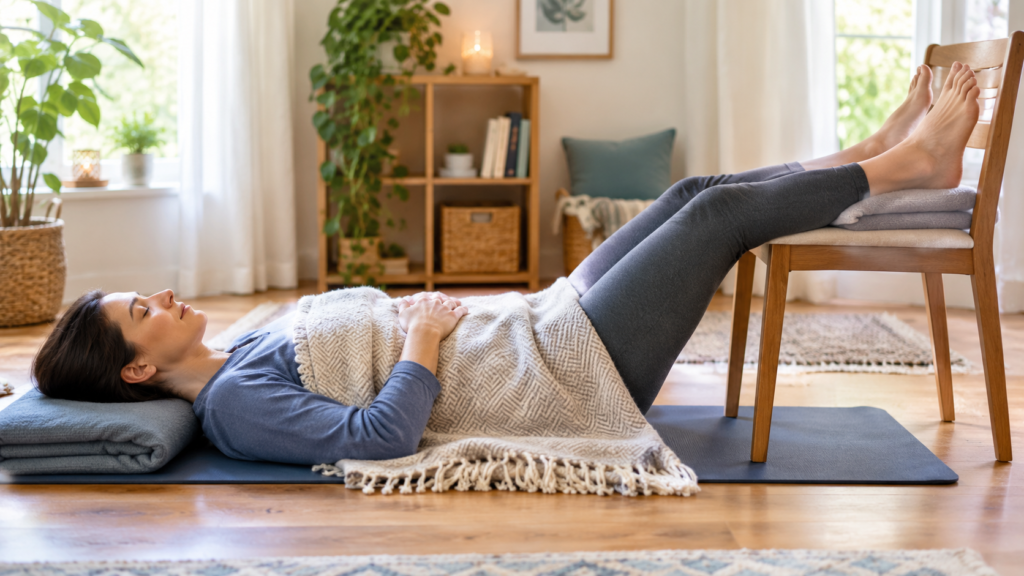
Forget the Instagram version with the pretzel poses and the perfect sunrise. Here’s what it looks like for me: slow stretching, lots of pillows, and a lot of breathing. Some days it’s just lying on the floor with my legs up on a chair.
If it feels like a workout, it’s too much.
The one rule that changed everything for me is the 3-out-of-10 rule. Rate your pain from 0 to 10 while you stretch. Stay at a 3 or below. If it creeps toward a 4, back off right away. Also pay attention to how you feel the next day, because that’s the real test. A pose that feels fine at 6 pm but leaves you wrecked at 6 am isn’t working for you.
What You Need Before You Start
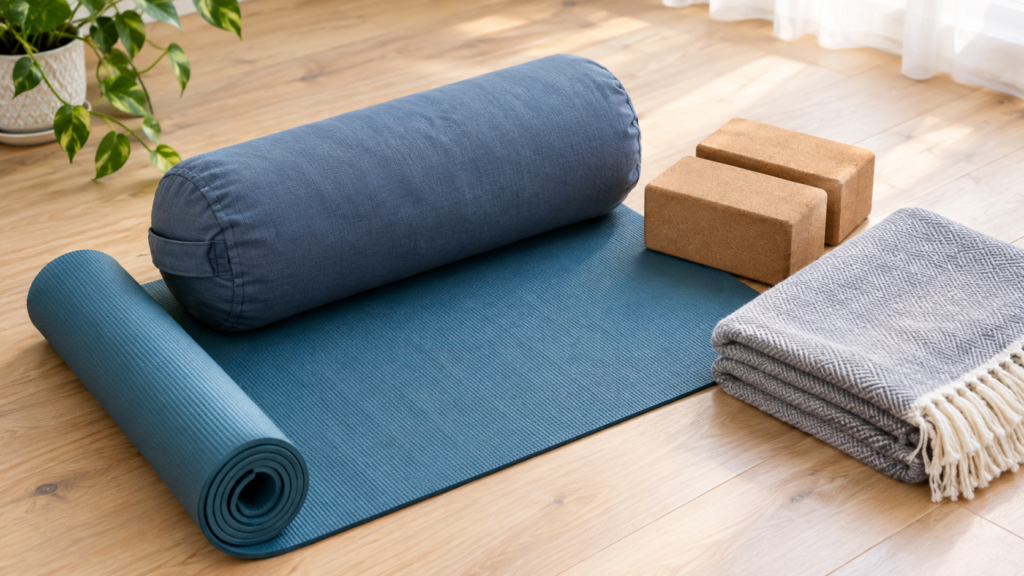
You don’t need much, but a few things make a big difference:
- A thick, non-slip mat. I use a 6 mm one. The thin mats were brutal on my knees.
- A bolster or two firm pillows. These are for support, and they’re the secret to making poses gentle.
- Two yoga blocks (or a couple of thick books).
- A blanket for warmth and for padding under the knees.
- A sturdy chair. Very useful on rough days.
If you like following along with a video, Yoga With Adriene on YouTube has lots of free, slow beginner sessions. The Down Dog app lets you choose a gentle level and shorten the session, which I like. Insight Timer has free guided relaxation if you want a calm way to finish.
My Ten-Minute Starter Routine
This is the routine I built over a few weeks. Move slowly, breathe the whole time, and skip anything that doesn’t feel right.
- Belly breathing (1 minute). Lie on your back with your knees bent and one hand on your belly. Breathe in through your nose for about 4 counts, then out for about 6. This calms me down before I move at all.
- Pelvic tilts (1 minute). Still on your back, gently rock your lower back toward the floor and then release. Small movements only.
- Cat-cow (1–2 minutes). On hands and knees, arch and round your back slowly. Put a folded blanket under your knees. If your wrists complain, do it seated on a chair with your hands on your thighs.
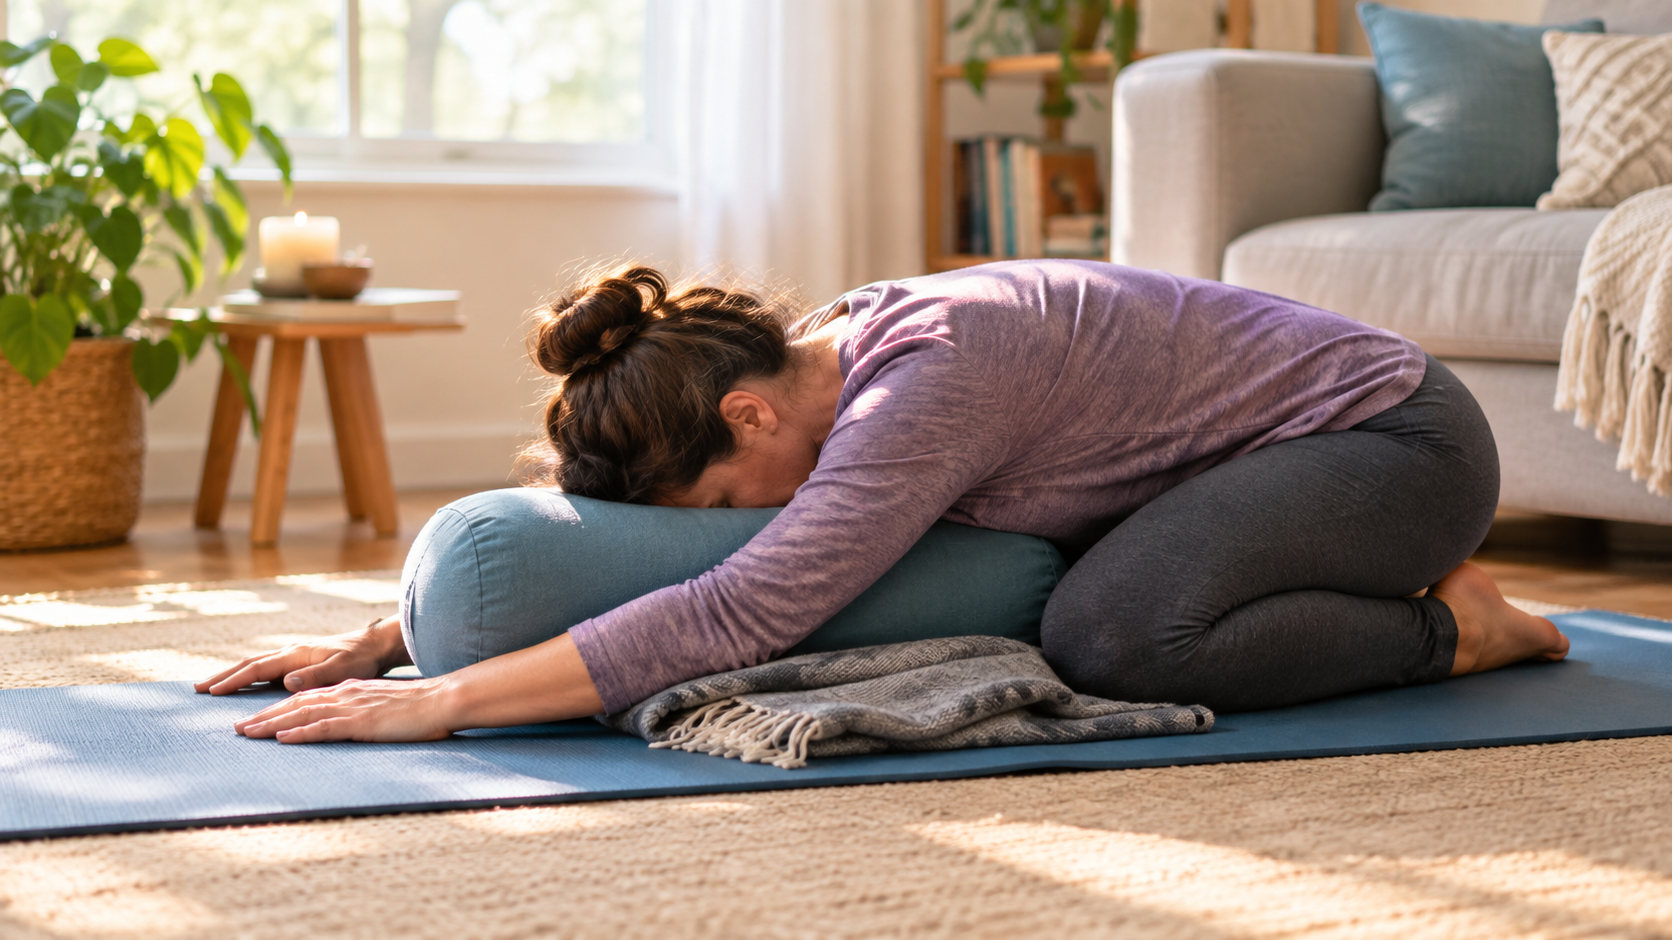
- Supported child’s pose (2 minutes). Kneel, spread your knees wide, and rest your chest on a bolster or stacked pillows. If your knees hurt, skip it and hug a pillow while sitting in a chair.
- Supine twist (1 minute per side). Lie on your back, let both knees fall to one side, and put a pillow between them. Keep your shoulders relaxed.
- Legs up on a chair (2 minutes). Rest your calves on the seat of a chair. It feels like a reset for tired legs.
- Final rest (2 minutes). Lie still with a blanket over you. Don’t skip this part. It’s where my body seems to settle.
How Often Should You Practice?
This is where I got it wrong at first. I decided I’d practice every single day, and by day five I was exhausted and cranky.
Now I aim for two or three days a week. In my first month I kept every fibromyalgia yoga session to about ten minutes, and I only added a couple of minutes once a week felt easy. A short session you can repeat beats a long one that knocks you out.
One more tip: pick your best time of day. For me, that’s mid-morning after a warm shower. Cold, stiff muscles do not enjoy being stretched.
Mistakes I Made (So You Don’t Have To)
Going hard on good days. When I felt decent, I’d do a long session to “make up” for bad days. Then came the crash. Keeping a steady, small routine works better than boom and bust.
Holding my breath. I didn’t realize I was doing it until my neck felt like concrete. If you can’t breathe smoothly in a pose, it’s too intense.
Pushing through pain. “No pain, no gain” is terrible advice here. Mild stretching is fine. Sharp, burning or spreading pain is your cue to stop.
Trying hot yoga. Some people love the warmth. For me, it meant dizziness and a wiped-out weekend. If you want to try it, test it once and see how you feel the next day.
Comparing myself to a class. The biggest lesson from my early weeks of fibromyalgia yoga was that nobody in the room knew my pain level. I stopped copying what the teacher did and started doing what my body could handle.
What Actually Changed
I’d love to tell you the pain vanished. It didn’t.
After about six weeks, I noticed smaller things. My mornings were a little less stiff. The tightness in my neck and shoulders eased a bit. I slept slightly better on the days I practiced. Maybe the biggest change was mental: I had something I could do when my body felt out of control, instead of just waiting it out.
Flare-ups still happen. Yoga is a tool, not a fix.
What I Do on Flare-Up Days
On bad days, I lower the bar dramatically. My version of fibromyalgia yoga on a flare day is five minutes of belly breathing and legs up on a chair, maybe a blanket over me. Sometimes I do nothing at all, and I’ve stopped feeling guilty about that. Resting during a flare isn’t failing. It’s part of the plan.
Talk to Your Doctor First
This is my personal experience, not medical advice. Check with your doctor or physical therapist before starting, especially if you have other health conditions, dizziness, very flexible joints, or you’re unsure which movements are safe for you. Stop right away if you feel sharp pain, numbness, chest pain, or anything that seems off.
Final Thoughts
If you’re standing at the edge of fibromyalgia yoga, wondering whether it’s worth the risk, start smaller than you think you need to. Ten minutes, a pillow, and a chair are enough. Be kind to yourself, keep your pain at a 3 or below, and let your body set the pace. It took me a failed class and a few sore days to learn that, but it’s a lesson I’m glad I got.